Corners get rounded
An ordinary automatic trace rounds off corners, wobbles on straight lines and bloats small letters. On a logo, a sign or a plan it shows straight away, and it all has to be fixed by hand.
Critical PHP vulnerability — 21 October 2026
Software for Windows 10 and 11 · Mac version coming soon · made in Bergues, France
Give it a scanned logo, a phone photo or an old plan: VectoScan Lab redraws it as vectors. Circles are round, straight lines straight, corners sharp, text turns back into letters, and each colour lands on its own layer, ready for Illustrator, Inkscape, cutting or CAD.
A straight line stays straight, a rectangle stays a rectangle, a corner stays sharp, a letter becomes a letter again.
During the trial every function is unlocked, including those of Complete and Studio. · From € 249,00 lifetime licence, 1 computer

An ordinary automatic trace rounds off corners, wobbles on straight lines and bloats small letters. On a logo, a sign or a plan it shows straight away, and it all has to be fixed by hand.
The more anchor points a path has, the harder it is to edit. VectoScan Lab places every outline to a tenth of a pixel and keeps about half as many points as a conventional tracer, for the same fidelity.
Letters traced as shapes can’t be corrected. Here, the text it reads is replaced by a real font and stays editable text, exactly in place.
Seven main areas, from the scan to a file ready for cutting. Every setting has its tooltip, and the F1 key opens the help for the screen you’re on.
The heart of the software
When a picture opens, VectoScan Lab looks at it and picks the preset that suits it: logo, print, line drawing, plan, photo. You stay in control of every setting, and the Auto button tries about forty combinations to keep the best balance between fidelity and simplicity.
Circles, ellipses, rectangles, polygons and stars are found exactly, and corners rounded by the scan become sharp again. Nothing is forced: a real curve stays a curve.
In every edition; Fine, Maximum and Ultra levels from Complete

Where it starts
VectoScan Lab opens almost any picture, scans straight from your scanner and takes a scanned PDF at its real resolution. A photo taken at an angle is straightened before it is traced: the software finds the support by itself (card, sticker, sign, round badge) and its true proportions.
For a logo painted on a wall or a car body, it uses the straight lines around it. It suggests, you choose.
In every edition; curved surfaces from Complete

Colour plans
A scanned colour plan brings together dozens of logos, numbers and small captions. VectoScan Lab removes the background and the support, gives each ink a single colour across the whole sheet and keeps the printed whites.
Small characters are re-read at the full size of the scan and redrawn in a font. A character the scan doesn’t show stays as it is traced: the software never guesses.
Normal quality in every edition; small characters and repeated motifs from Complete

Plans and technical drawings
For a plan, a section or a diagram, each line becomes a real stroke, not the outline of a stroke: 0.5 pt for construction, 0.25 pt for details. Straight lines are straight, a double line stays two thin lines, and nothing is made up: only what is on the paper gets drawn.
Corrections are proposed, never imposed. Hidden lines and centre lines keep their pattern, dimensions can be read, and the DXF is written at full size to the plan’s scale.
Complete and Studio editions

Text and fonts
The letters and digits it reads are replaced by a font: the original one when it is recognised, otherwise an existing font with the same letter design. In the SVG and in Illustrator, they are editable text.
The font workshop goes further: from a few letters of a good-quality image, it rebuilds the whole alphabet, accents and digits included, and saves it as a real font installed in Windows.
Simple text reading in every edition; font workshop from Complete

Photo workshop
Before tracing a photo, you can repair it: dust, scratches, yellowing, faded colours. A black and white photo is colourised on your computer, offline once the engine is downloaded. A colour photo changes colour area by area, shadows and reflections kept, the rest of the picture untouched.
Background blur keeps the subject sharp, with adjustable depth of field. And a photo can become a drawing, then a vector.
Restoration, automatic colourisation and four styles in every edition; the rest from Complete


Output
The drawing comes out at its real dimensions, whether it goes to the printer, a cutting plotter, a laser or a 3D printer. The Illustrator button sends it into the open document, one layer per colour with its RAL reference; Inkscape receives it the same way. With FFSMC Cut Lab installed, the “Send to Cut Lab” button passes it straight to cutting on a Silhouette machine.
A whole folder can be processed in one go, and a new run only picks up new or changed images.
SVG, PDF, PNG and Illustrator in every edition; EPS, DXF, 3D relief and batch from Complete

Screenshots of the software as you will install it, version 5.2.3. Click to enlarge.
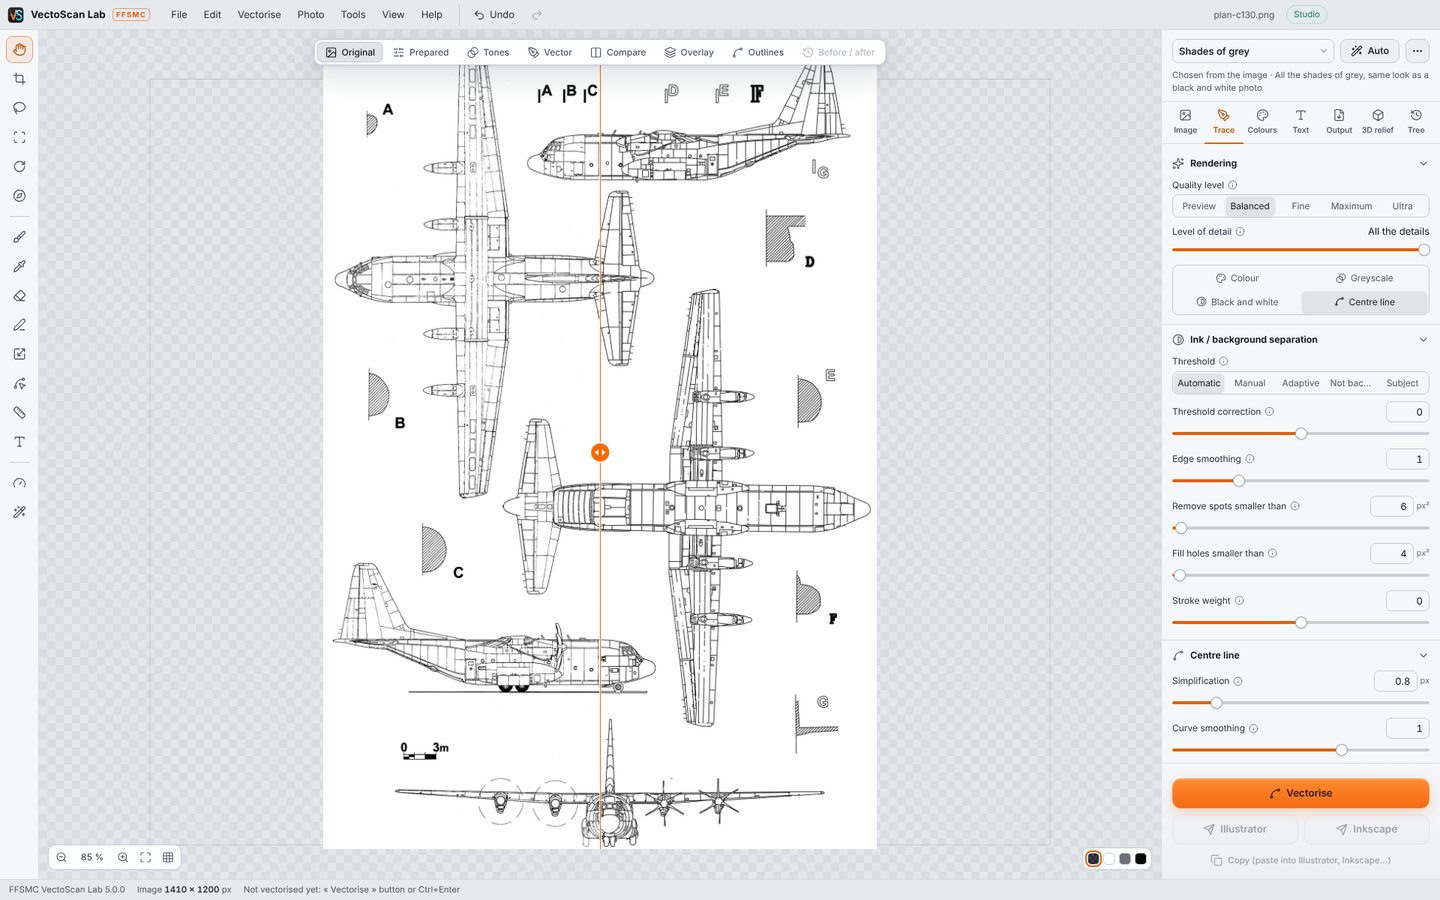
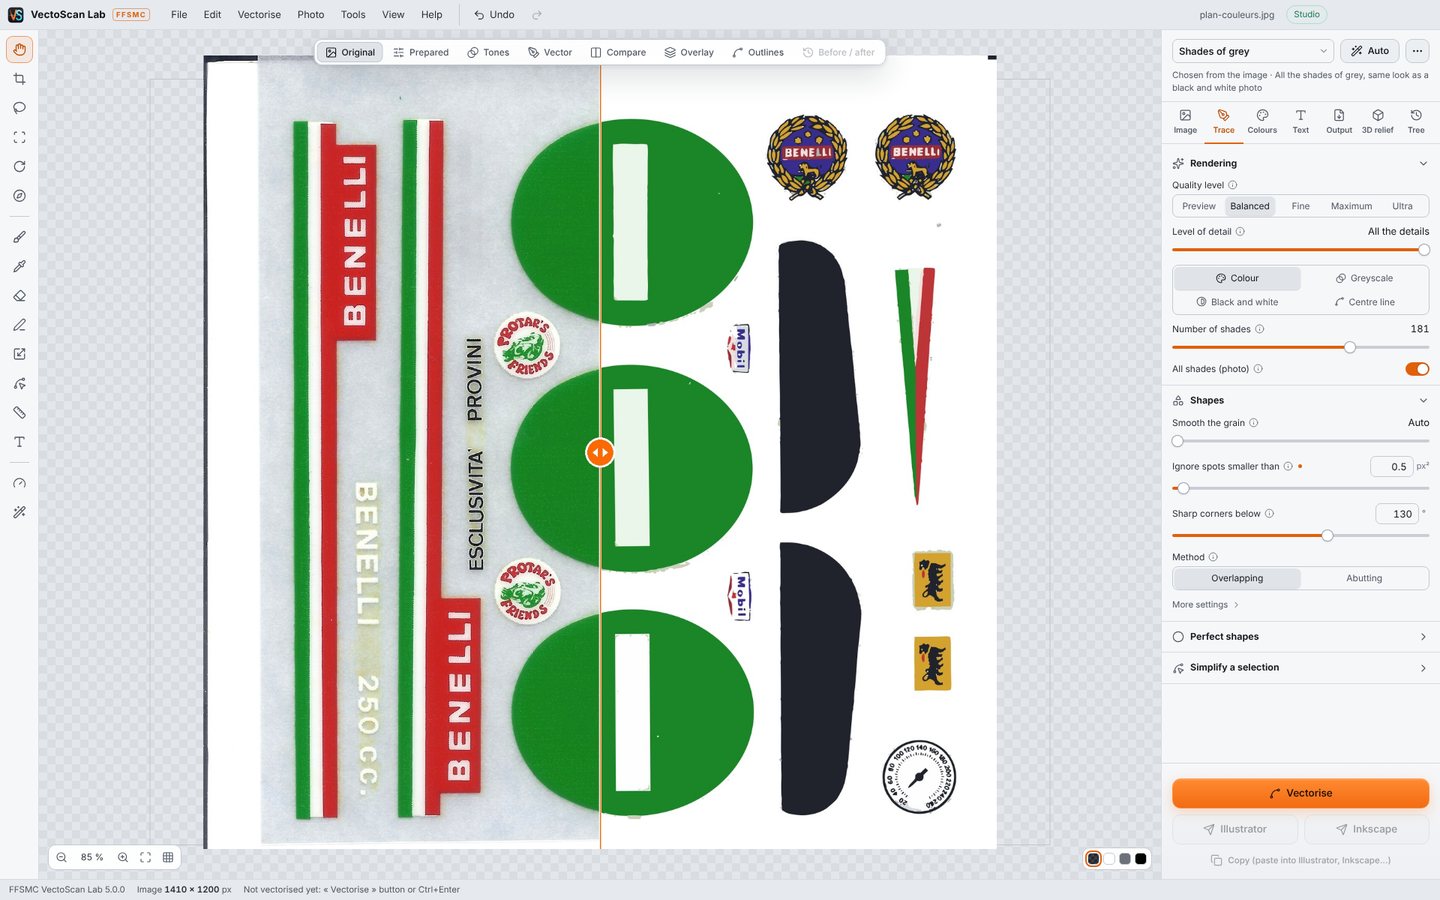
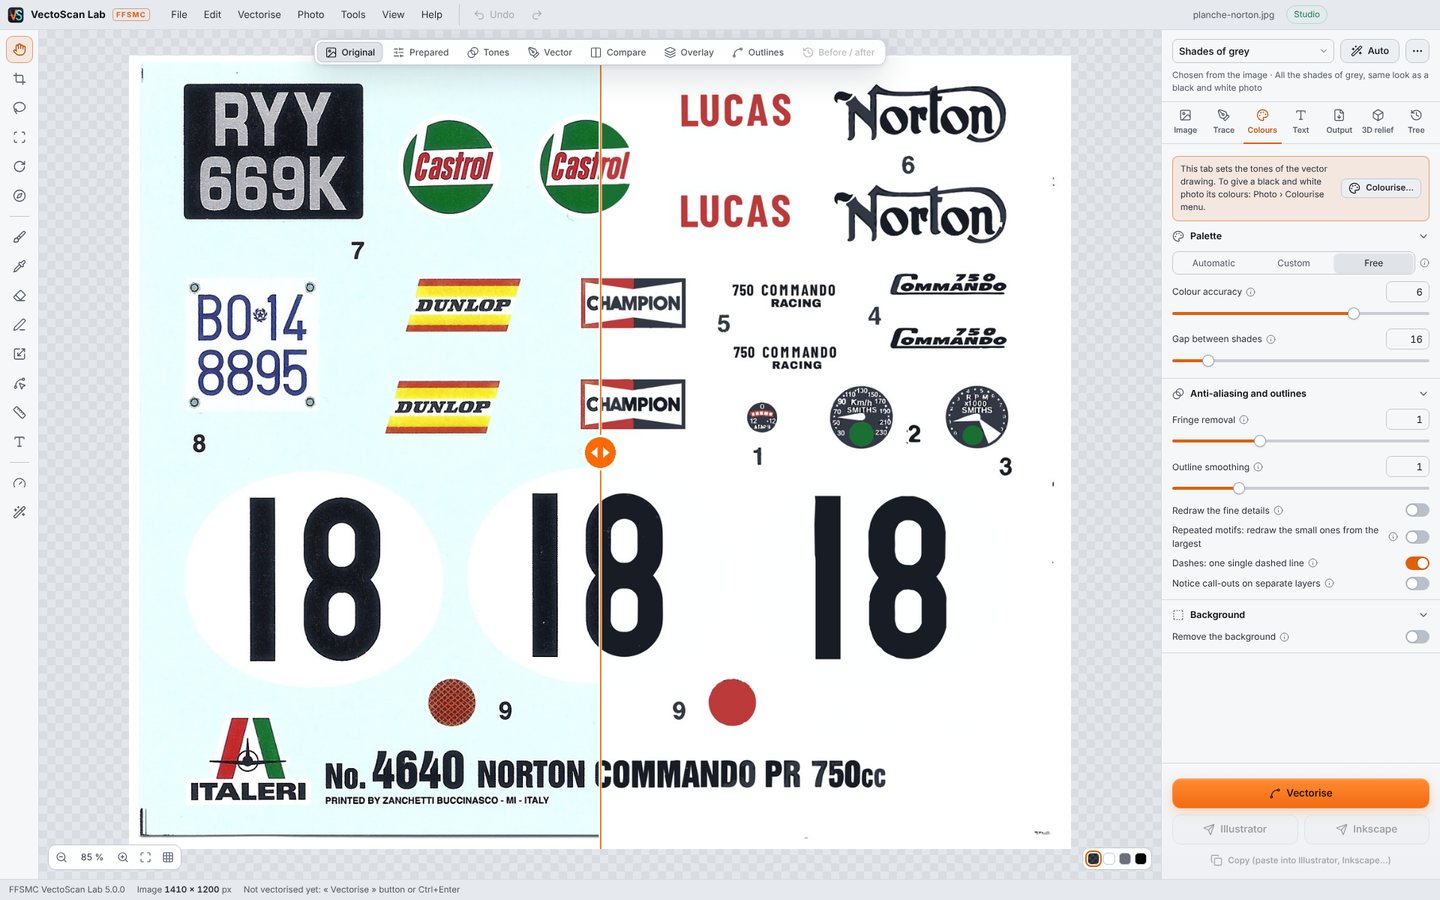
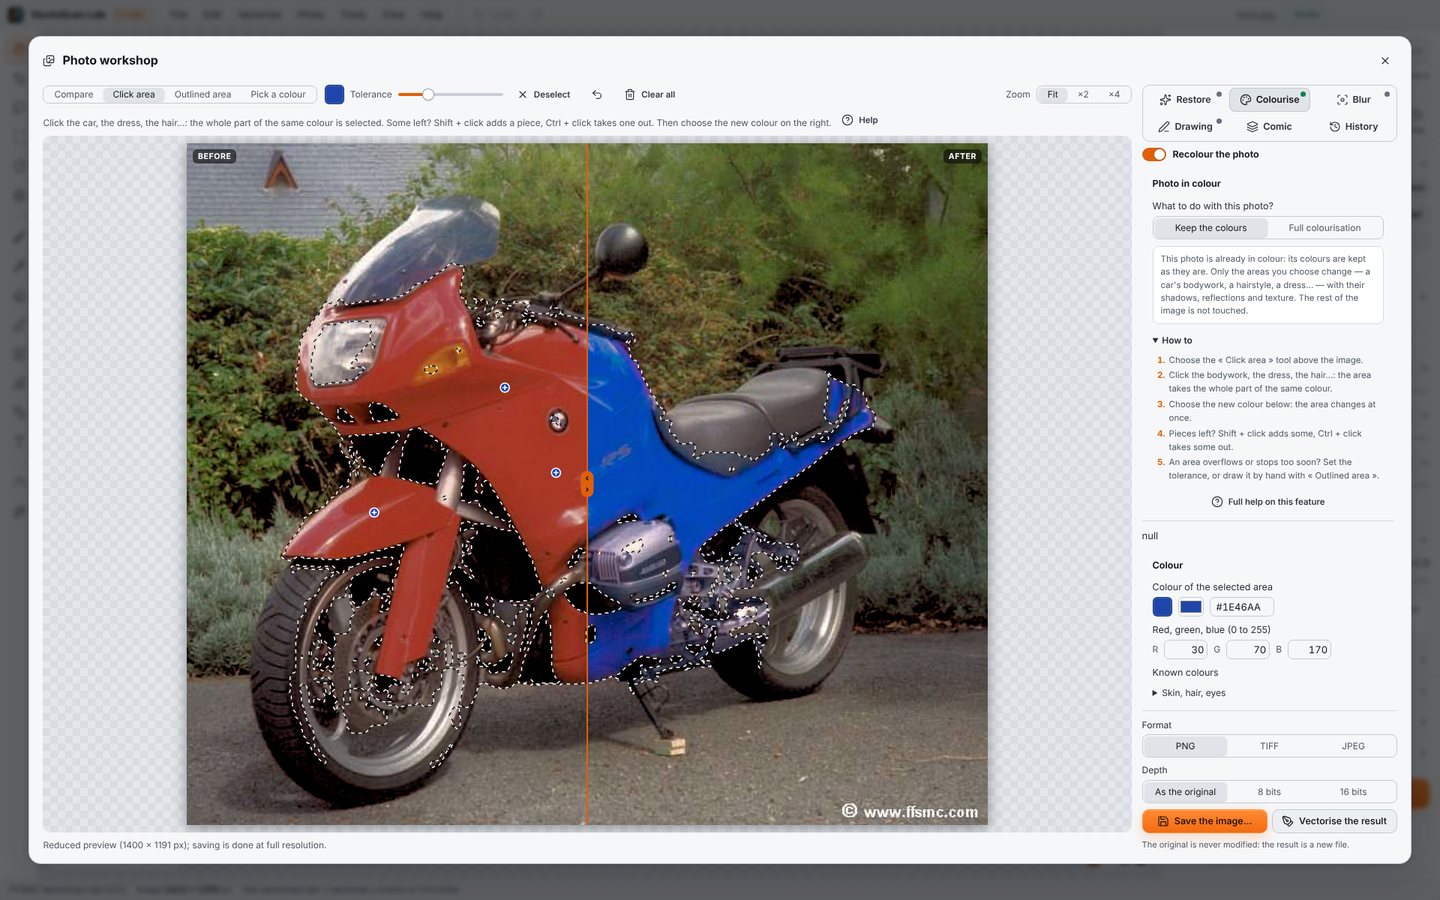
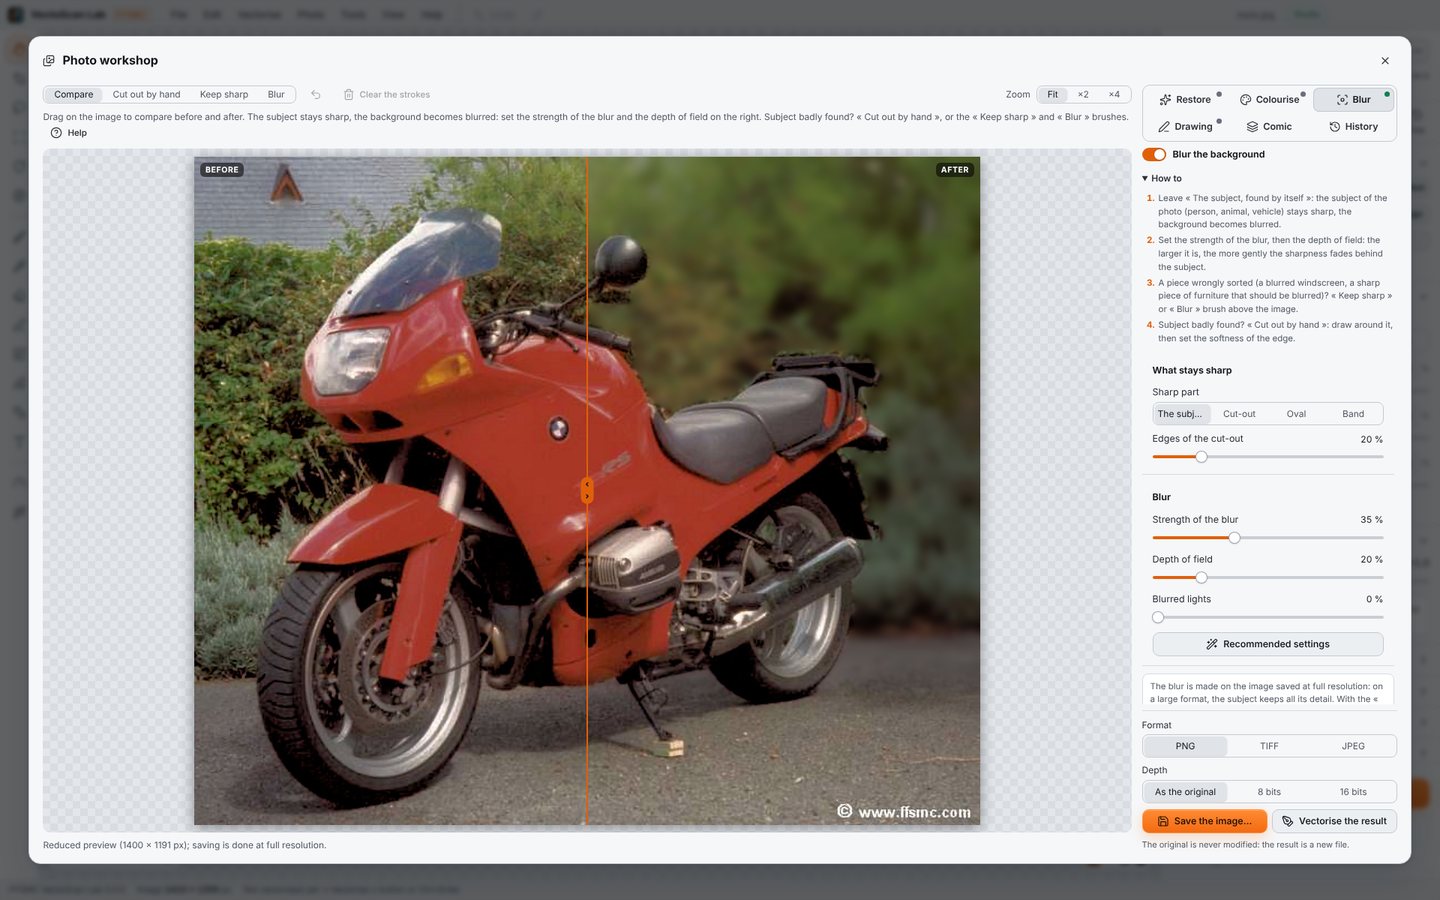
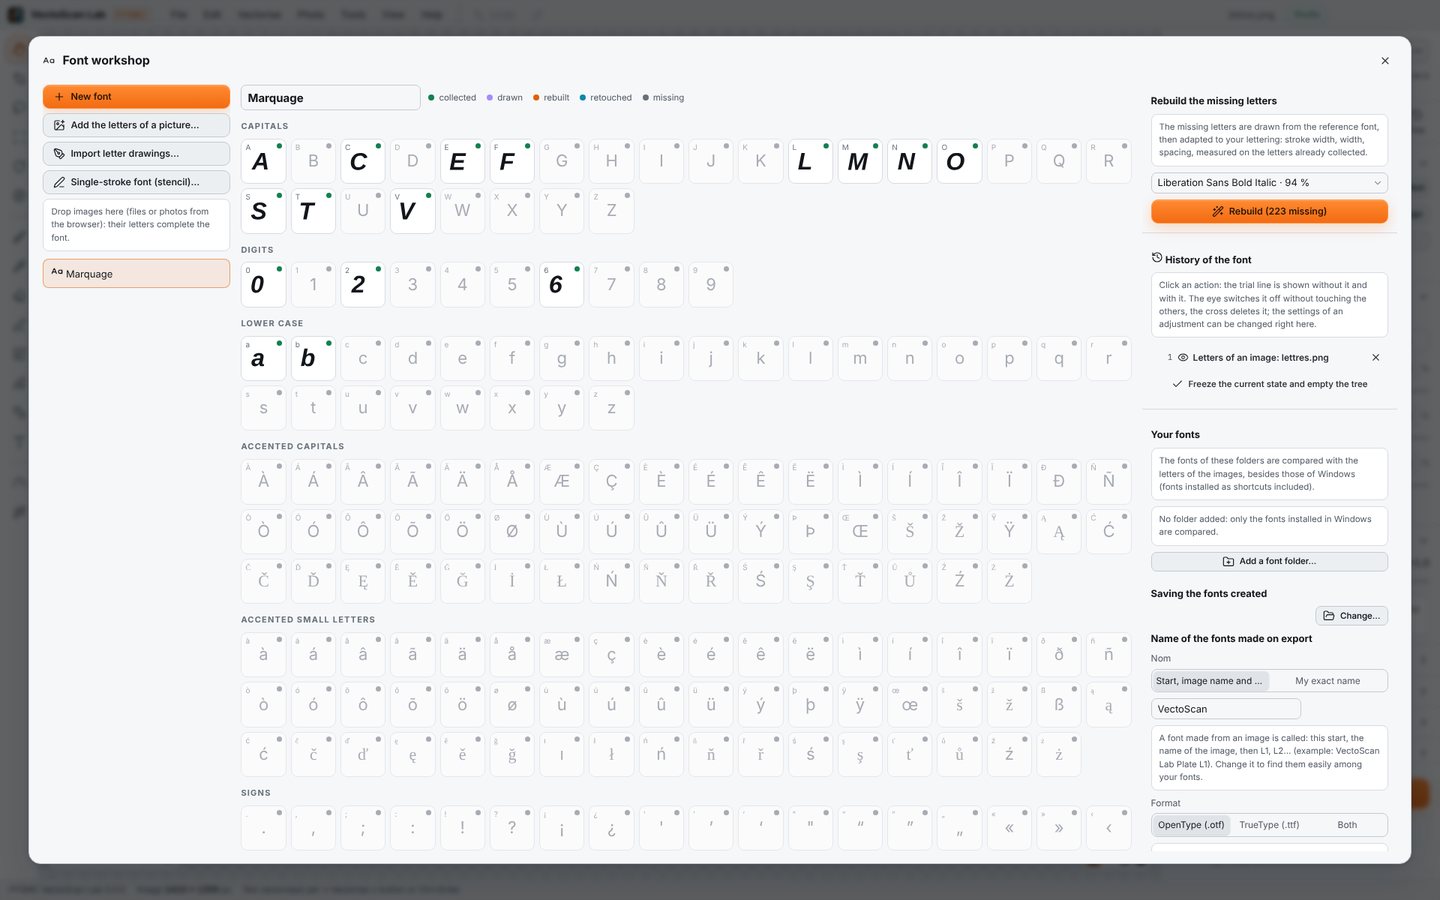
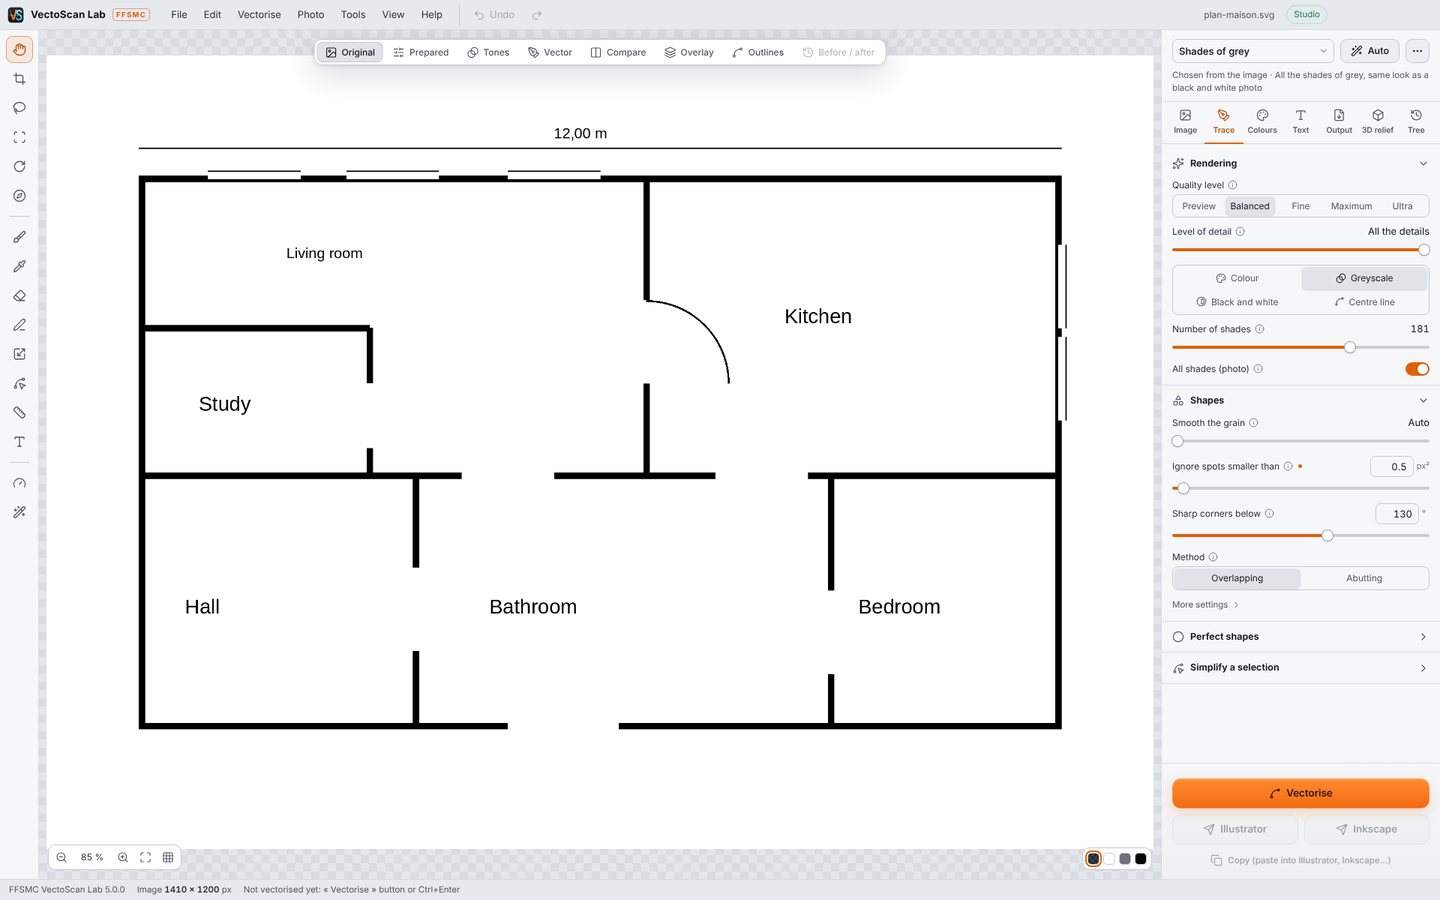
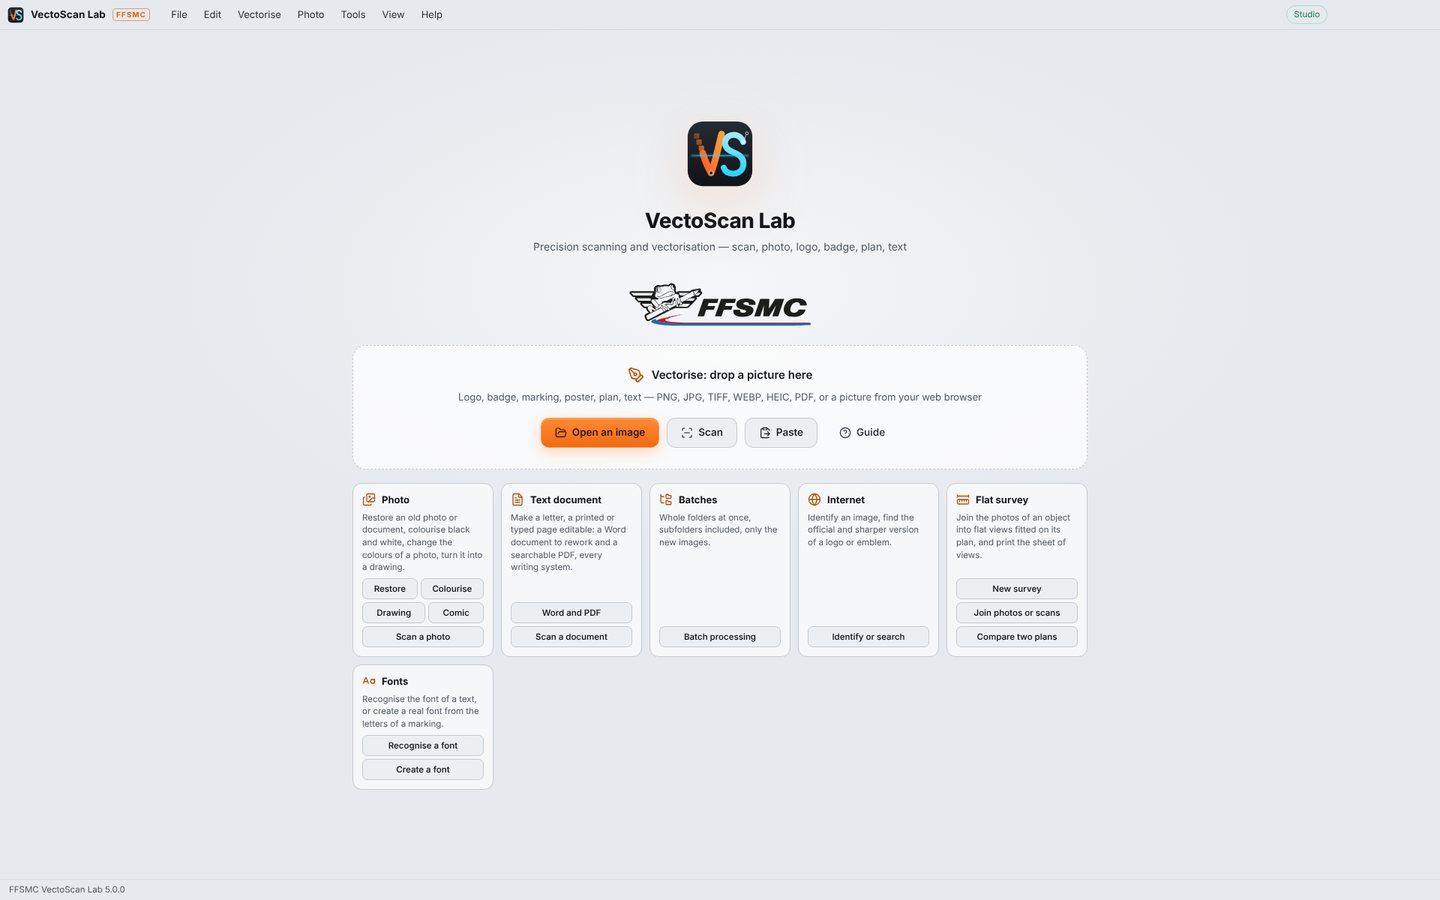
Software that redraws your pictures shouldn’t decide anything for you. VectoScan Lab suggests, you decide.
Your original picture is never modified, and batch processing never overwrites the original.
The construction tree keeps everything you’ve done. Any step can be removed, put back or changed, even the very first one, and the drawing is recalculated.
Plan corrections, colour merges, uncertain dimensions, straightening: every suggestion waits for your yes or no.
A character that’s unreadable on the scan stays as it is traced. A font that doesn’t fit the letters leaves the original trace in place.
Each edition contains everything in the one before. You buy the licence once; updates are included for one year.
Everything you need to vectorise.
€ 249,00 lifetime licence, 1 computer
For logos, drawings, photos and everyday colour plans.
Recommended
Every function.
€ 349,00 lifetime licence, 1 computer
The edition we recommend for everyday work.
Complete on three computers.
€ 449,00 lifetime licence, 1 computer
Lifetime licence valid on 3 computers.
The licence covers the number of computers chosen when you buy it. To change computer, first deactivate the old one in Help › Licence…. After a year, nothing stops: the licence is for life. Only the updates included with your purchase come to an end. To move up to a higher edition later, you only pay the difference.
| Function | Essential | Complete | Studio |
|---|---|---|---|
| Open every image, scan from the scanner | |||
| Vectorise logos, drawings and colour photos | |||
| Colour plans (normal quality) | |||
| Photo workshop: restore, colourise automatically, turn into a drawing (four styles) | |||
| Perfect shapes (circles, rectangles, polygons) | |||
| Reading of simple text | |||
| SVG, PDF and PNG export | |||
| Projects, presets and user manual | |||
| Pure-stroke plans: vector strokes, screens, proposed corrections, single-stroke lettering, line types and dimensions | — | ||
| Leader lines and numbers (colour plans) | — | ||
| Fine, Maximum and Ultra quality levels | — | ||
| Small lettering on sheets read one piece at a time, repeated motifs made identical | — | ||
| Font workshop and search for free fonts on the web | — | ||
| 3D relief (STL, 3MF) and stencils | — | ||
| EPS and DXF export (printers, CNC, laser cutting) | — | ||
| Batch processing | — | ||
| Full colourisation, recolouring a colour photo, background blur | — | ||
| Every drawing style from a photo, and the Comic module | — | ||
| Identify an image, find a logo on the internet | — | ||
| Flat survey from photos, joining several photos or scans | — | ||
| Text document as editable Word and searchable PDF | — | ||
| Comparing two versions of a plan, flattening curved surfaces | — | ||
| Three computers | — | — | |
| Edition | € 249,00 | € 349,00 | € 449,00 |
Download the installer and double-click it: VectoScan Lab runs for 7 days with every function. If Windows shows “Windows protected your PC”, click “More info”, then “Run anyway”.
Taken from the user manual, these moves save time from your very first pictures.
To get to know the software, take a logo, a drawing or a plan. A family photo isn’t the best first try. Go once from opening to export before looking for the fine settings: almost everything else uses the same moves.
Where Home screen: drop the picture into the window
The Compare view splits the original and the vector with a slider. Zoom with the wheel and look at small text, corners and colours first: that’s where you see what’s wrong.
Where Views bar › Compare (F6)
It colours in red the places where the trace drifts from the picture, and the fidelity percentage appears in the status bar. Press again to remove it.
Where Deviation map tool (G) or Vectorise menu
Disappointing result? Move to the next quality level, or pick another preset, then vectorise again. “Balanced” suits most pictures; for a sheet with small characters, take “Fine” or higher.
Where Trace tab › Quality level
Crop and straighten first, choose the mode and the preset, then run Auto: it compares about forty combinations and keeps the best balance between fidelity and simplicity. “Back to the previous setting” undoes it all.
Where Auto button, top of the panel (A key)
Often working on the same kind of picture? Set one up, then save those settings under a name (“Client logos”, for example). They come back every time you open the software.
Where “…” menu right of the Auto button › Save as preset…
An edge tone has crept into the palette: right-click it, then “Merge with the closest colour”. The other way round, with 3 colours imposed, a tiny touch of colour can be swallowed by its neighbour: add a colour with the slider to keep it.
Where Right-click on the colour in the picture; Trace tab › Number of colours
If the paper background stays inside a frame or the counter of a letter, untick “Only the outer background”: the whole background is then removed.
Where Trace tab › Only the outer background
For a badge on an object photographed at an angle, crop to the useful part first, then straighten the whole picture using the badge as a reference: the rest of the photo, too distorted, is left out.
Where Crop tool (C), then Straighten (P)
No need to be precise: a loose line with a 10 to 25 % margin round the shape is enough. The first suggestion isn’t always the right one: try the other buttons, and “(smaller)” or “(larger)”. Ctrl draws a rectangle, Alt an ellipse.
Where Outline a shape tool (L)
On a medium-resolution picture, leave the working enlargement at ×3 or ×4, then turn on symmetry and perfect circles.
Where Image tab › Symmetry; Trace tab › Perfect shapes › Perfect circles
While the four optional corrections are at “No”, the “Perfect shapes” title shows how many corrections are possible on the picture. “Try” sets them in a single action, which Ctrl+Z undoes.
Where Trace tab › Perfect shapes › Try
Click both ends of a known dimension (the width of a sign, a plate), give its value in millimetres and the scale you want: the export comes out at the right size.
Where Measure tool (M), then Output tab
In Illustrator, the colour layers are copies of the overall view. For a cutting file, keep either the overall view or the colour layers, not both: otherwise everything is cut twice.
Where Illustrator, layers sent with the Illustrator button
Choose “Actual size” in VectoScan Lab, then leave the scale at 100 % in the Windows print window: otherwise the printer shrinks the page.
Where File › Print… (Ctrl+P)
The two versions are shown in turn, in the same place: whatever has changed jumps out. It’s the surest way to judge by eye.
Where Tools › Compare two versions of a plan… › Blink (Complete and Studio)
Keep your documents in folders by client or by year and run the batch with Incremental ticked. Add documents later and run it again: only the new ones are processed.
Where Tools › Batch processing… › Incremental (Complete and Studio)
In the construction tree, the cross strikes out a step and the drawing is recalculated without it, but the step only goes for good when you confirm the deletions. The eye, for its part, turns a step off without touching the others.
Where Tree tab › Confirm the deletions
The photo of a badge laid flat can be saved as a TIFF, as a reference or to send to someone.
Where File › Save as an image… (Ctrl+Shift+I) › Straightened image
The commands added to Illustrator don’t carry over to a new Illustrator version: run the installation again, then restart Illustrator.
Where Tools › Install sending to Illustrator…
A trace can’t be better than the picture it starts from. Ten minutes at the scanner save hours of touching up, with or without VectoScan Lab.
At least 600 dpi for a logo, a drawing or a plan, 1,200 dpi for fine print, very small characters or a small badge, 300 dpi for a photo.
In the scanner driver, turn off sharpening, dust removal, automatic colour correction and descreening. VectoScan Lab makes these corrections itself, knowing what it is doing.
For a line drawing, scan in greyscale rather than black and white: the software separates ink from paper far better than the scanner does. For a print, even an almost monochrome one, scan in colour: inks are recognised by their shade.
JPEG compression damages exactly the small characters. If your scanner only offers JPEG, choose the highest quality.
A speck of dust, a fold or a reflection ends up in the drawing. For white letters printed on clear film, also scan with a black sheet behind: the white stands out.
For a photographed page, take it sharp and whole, laid on a background darker than the paper. For a logo shot at an angle, keep it whole in the frame with a little margin: you crop and straighten afterwards.
What people ask before buying, and what they look for once the software is installed. Type a word or pick a topic.
It turns a pixel image (a scan, a photo, a screenshot, a PDF) into a vector drawing: shapes that stay sharp at any size, which you then take into Illustrator, Inkscape, cutting software, CAD or print. A logo enlarged for a sign, an old plan to clean up, a marking to cut out of vinyl.
An ordinary automatic trace rounds off corners, wobbles on straight lines and bloats small letters. VectoScan Lab tries to redraw what the original designer meant: a circle becomes a true circle again, a rectangle a true rectangle, a corner a sharp angle. Every outline is placed to a tenth of a pixel, with about half the points of a conventional tracer, and the text it reads becomes real letters in a font.
Anyone who has a picture and needs a clean trace: graphic designers, sign makers, screen printers, vinyl cutting, laser engraving and CNC, embroidery, printers, architects and draughtsmen working from old plans, clubs and associations who want their logo back. The ready-made presets cover logos, prints, line drawings, plans and photos.
Yes. Download the installer from this page: VectoScan Lab runs for 7 days with every function, including those of the Complete and Studio editions. A badge at the top right shows the days left.
The software locks. A screen offers the three licences from the ffsmc.fr shop and a box for your key. The trial cannot be reset.
You buy the licence once, with no subscription: €249 for Essential, €349 for Complete, €449 for Studio (Complete on 3 computers). Updates are included for one year.
No. VectoScan Lab is software for Windows 10 and 11, 64-bit.
8 GB of memory is recommended. Calculations are kept light for modest computers: a calculation already done is not redone. Allow a few seconds for a logo and up to several minutes for a whole sheet at the highest quality levels. Automatic colourisation needs about 3 GB of memory while it runs.
French, English, Spanish, German, Italian, Polish and Brazilian Portuguese: the software, the built-in help and the user manual. Change the language in View › Langue / Language.
PNG, JPEG, GIF, BMP, TIFF, WEBP, AVIF, HEIC and PDF. You can also paste a copied image (Ctrl+V), drag a picture from a web page or scan straight from your scanner. For a multi-page PDF, you pick the page from its thumbnails.
600 dpi for a logo or a drawing, 1,200 dpi for fine print or a small badge, 300 dpi for a photo. A scan at 600 dpi or more is worked at its full resolution.
Yes: File › Scan… (Ctrl+Shift+N). Every Windows-compatible scanner is recognised. You choose the document type (logo, printed document, magazine, yellowed document, line drawing, plan, photo…) and the matching resolution, mode and preset are applied. The picture arrives at its real size.
Yes. First try Vectorise › Straighten automatically: the software looks for the support (card, sticker, sign, round badge) and offers to flatten it, in its true proportions. Otherwise use the Outline a shape tool (L): draw loosely round the shape and it finds the exact edge. For a logo painted on a car body or a wall with no clear frame, the Image tab offers “Painted logo”. Nothing is applied without your say-so.
The “Curved surface” mode of the Straighten tool (Complete and Studio editions) flattens the part from a grid of marks placed on the photo, from 2 × 2 to 9 × 9. A verdict (reliable, to watch, doubtful) tells you whether the result can be trusted. The more curved the part, the more marks it needs.
Often, yes: “Scanned logo / JPEG” preset, Maximum quality level (or Ultra for a very small logo), then Auto. A picture that has already been enlarged is recognised, so the trace doesn’t follow the ripples of its pixels. But details smaller than a few pixels in the original picture cannot be recovered.
The “Yellowed document” preset brings back the white and the original colours. If the white isn’t quite right, Image tab › “Pick the white” and click an area that should be white. Cleaning can also remove creases and folds and small stray marks (scratches, hairs) while leaving letters and rules alone.
Scan it in pieces that overlap a little (a third of the edge is enough), then Tools › Join several photos or scans into one picture…. The pieces are matched by their lines, put in place and blended, with the scan resolution kept. Complete and Studio editions.
With the “Plan, technical drawing (pure strokes)” preset, every line becomes a real vector stroke, not the outline of a stroke: 0.5 pt for construction lines, 0.25 pt for details, both adjustable. Straight lines are straight, a double line stays two thin lines, and a line broken by accident is joined up. The software only draws what is on the paper, and every correction (circle to complete, rounded corner, leader line) is offered to you: Yes or No, line by line or all at once. Complete and Studio editions.
Yes. The dashes of a hidden line, the chain lines of centre lines, dotted lines and phantom lines are kept as line types (HIDDEN, CENTER, DOT and PHANTOM in the DXF). Dimensions are read if you tick “Recognise dimensions” (Trace tab): a reliable dimension becomes an editable one, the others are only proposed. Reading is reliable from about 100 dpi. It has been checked on plans made for testing, not yet on a real dimensioned plan: check the values.
Yes. Enter the plan’s scale (from 1/10 to 1/1000) in the Output tab: the DXF is written at full size, one layer per colour, screen or texture, with reliable dimensions on the COTES layer. DXF is in the Complete and Studio editions.
A regular screen is redrawn at the same spacing and angle, or turned into a plain area, or removed. A library of 96 vector textures in 12 families (masonry, wood, concrete, floors, metals…) fills an area like a colour, and “Recognise on the plan…” suggests the three textures closest to a pattern you frame.
Yes, version 5 was built for them. The “Print on a background” preset is chosen by itself: background and support removed, one shade per ink across the whole sheet, printed whites kept. Essential handles them at normal quality; the Fine, Maximum and Ultra levels and small characters re-read one by one are in Complete and Studio.
Yes: Tools › Compare two versions of a plan… (Complete and Studio editions). The two scans are laid over each other by themselves; additions show in green, deletions in red, with a numbered list of areas. The result can be saved as a PNG image, a PDF report, or SVG or DXF layers.
Yes. The letters and digits it reads are replaced with a font: the original one when it is recognised, otherwise an existing font with the same letter design. In the SVG, in copy-paste and when sent to Illustrator, they stay editable text, in place. Lettering the reader isn’t sure about keeps its traced shape.
No, never. A character the scan doesn’t show stays as it is traced. Rescan instead at 1,200 dpi for very small text, or with a black sheet behind for white letters on clear film.
Yes, with the font workshop (Complete and Studio editions). A few letters are enough: the others are redrawn from the closest existing font, at the weight and width of your lettering. The font is saved as OTF, TTF or both, and installed in Windows. Start from a good-quality image: a blurry logo would give a poor font.
Latin letters in the software’s seven languages, plus Chinese, Japanese, Korean, Arabic, Hebrew, Greek, Russian, Thai and Hindi. If the picture isn’t in the software’s language, pick its language in Text tab › “Language of the text to read”.
Yes, with the “Text document” tile on the home screen (Complete and Studio editions): a printed or typed page becomes an editable Word file and a searchable PDF, columns, tables and headings included. Always read the text through; handwriting is not read reliably.
SVG, PDF and PNG in every edition; EPS and DXF in Complete and Studio, along with STL and 3MF for 3D relief and OTF or TTF for fonts. File › Export… (Ctrl+E) writes several formats at once, under the same name. If in doubt, choose SVG.
The Illustrator button, next to Export (Ctrl+Shift+E), sends the drawing into the open document, in named layers: the overall view, one layer per colour with its RAL reference when it is close, the white underbase and the cut line. Tools › Install sending to Illustrator… also adds three commands to Illustrator’s File › Scripts menu, including “Vectorise the selection”. For Inkscape, the Inkscape button does the same, and the “SVG Inkscape” export gives real, named Inkscape layers.
“Vinyl cutting / screen printing” preset: Abutting method, so the colours fit together exactly with no overlap. Reduce the number of colours to the number of vinyls, then export as SVG: one group per colour. For printing on film, the Output tab adds a white underbase and a magenta cut outline.
The “Centre line (engraving, cutting)” preset traces a single line down the middle of each stroke, with whole straight lines, arcs and circles. Set the stroke width to that of the beam, then export as SVG or DXF at real dimensions (DXF needs Complete or Studio).
Yes. For a scan, the resolution is picked up and the document’s size respected. Otherwise, set the width or height in millimetres in the Output tab, or measure a known dimension on the picture with the Measure tool (M) and give the scale you want. The export comes out at the right size.
Yes, in the Complete and Studio editions. Each colour becomes a volume of adjustable height, as STL or as colour 3MF for multi-filament printers. The stencil adds the bridges that hold the inside of O, A, D and B by itself; it comes out as STL, SVG or DXF.
Tools › Batch processing… (Complete and Studio editions) handles a folder and its subfolders with the settings of one representative image. With Incremental, ticked by default, a new run only processes new or changed images, and an interrupted batch picks up where it stopped. The original is never replaced.
It restores (dust, scratches, yellowing, faded colours), colourises a black and white photo, blurs the background and turns a photo into a drawing. In Essential: restoration, automatic colourisation and four drawing styles (Manga, Toddlers, Comics, Pencil). The rest is in Complete and Studio. The original is never changed.
Yes, in the Complete and Studio editions: Photo › Colourise or recolour a photo…, the area-by-click tool, then the new colour (swatch, hex, RGB or RAL). Shadows and reflections follow, the rest of the picture doesn’t move. Shift + click adds a piece to the area, Ctrl + click removes one.
Essential is enough for logos, drawings, photos and everyday colour plans, with SVG, PDF and PNG export. Complete, which we recommend for everyday work, adds pure-stroke plans, the Fine to Ultra quality levels, the font workshop, EPS and DXF export, batch processing and the full photo workshop. Studio is Complete on three computers. In Essential, reserved functions stay visible with a small crown, and Help › Compare the editions shows all three side by side.
Yes, paying only the difference: write to [email protected]. The new key is entered in Help › Licence… and replaces the old one, with nothing to reinstall and no settings lost.
No. The licence is for life and bought once. Updates are included for one year.
After buying on ffsmc.fr, you receive a key by e-mail. In the software: Help › Licence…, paste the key, click Activate. You can also enter it on the screen shown at the end of the trial.
On the old one: Help › Licence… › Deactivate this computer. Then activate the key on the new one. The licence covers the number of computers chosen when you bought it.
The licence is checked online from time to time. Without a connection the software keeps working for 14 days; after that it asks you to connect and click “Check now”.
The internet is used for a few specific functions: identifying an image, finding an official logo, looking for a free font on the web. Identification and the internet help on opening go through Google, with your own key; that help can be unticked in the “…” menu so nothing is sent. Colourisation runs on your computer, offline, once its engine is downloaded.
You don’t have to think about it. Once your licence is activated, VectoScan Lab looks for a new version by itself, a minute after it opens and then once a day. When it finds one, it shows you what it brings, with three buttons: Install now, Later or Skip this version. Before installing, it offers to save your work, and it keeps your settings, your licence and your fonts. Nothing is installed without your say-so, and an update is only accepted if it comes from ffsmc.fr and arrives intact. To turn this watch off or back on: Help › Tell me about new versions. To look yourself: Help › Check for updates. Installed from the Microsoft Store, VectoScan Lab is updated by the Store.
Click “More info”, then “Run anyway”. This warning appears for recent software that Windows doesn’t know yet. Only download VectoScan Lab from ffsmc.fr.
No. Raise the quality level by one step (Trace tab) or pick another preset, then vectorise again. Ctrl+Z undoes every setting, and the Tree tab keeps everything you’ve done: a step can be removed, put back or changed, and the drawing is recalculated. The original picture never changes.
Lumpy curves: increase the enlargement (×3, ×4), the outline smoothing, or the tolerance. Too many colours: check that “Unify reflections and shadows” is on and increase “Merge close shades”. Fringes round the shapes: raise “Fringe removal” and turn on “Ignore transition colours”.
In the software: the F1 key opens the help at the page of the screen you’re on, and Help › Complete manual (PDF) opens the illustrated user manual. You can also download it from this page, in English and six other languages.
Write to [email protected]: we reply within 48 working hours. For a result that isn’t right, give the preset and the quality level, and attach the picture.
No question matches. Write to us at [email protected]: the answer will help the next person too.
VectoScan Lab is designed and developed in Bergues by FFSMC, a small French company. Support replies within 48 working hours at [email protected].
Seven days, every function unlocked, to see what becomes of your scans, photos and plans.
Try it free